Infobox
Glow in the Dahrk
Caption
Details
Type Name Links Nexus Mods Requirements MWSE or
OpenMW (0.46 or newer)Author Melchior Dahrk
NullCascade
Glow in the Dahrk (GitD) is a modern replacement of the old Windows Glow mods. GitD automatically switches between day and night versions of NIFs by alternating between nodes underneath a parent NiSwitchNode. With this feature, any mod using the vanilla windows (or GitD-compatible meshes) will automatically switch to a glowing version at night in exteriors or during the day for interiors.
In order to work with most GitD meshes in NifSkope, a custom “nif.xml” file is required in order to read the NiCollisionSwitch node type which is used for light rays.
Info
Some features in GitD 3.0.0 and beyond only function with MWSE and are not supported by OpenMW as of the time of writing. Sections which detail those features will be placed into “MWSE-Only” callouts.
NIF Format
Many details of the NIF must use specific naming conventions and sequencing in order to function properly. Below is an example NIF which will be referenced in the following sections:
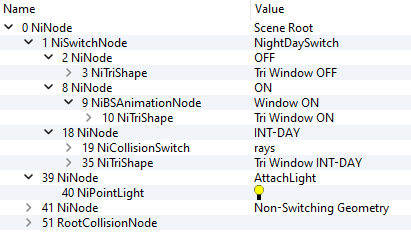
NightDaySwitch
The position of the NiSwitchNode underneath the root node is not important (e.g. it can be before or after non-switching geometry or the RootCollisionNode). But it MUST be named “NightDaySwitch” exactly to function properly.
Tip
The Index property of NiSwitchNode designates which child node will be displayed by default in the Construction Set or in game (without the intervention of any code attempting to switch it). This can generally be left at 0 (which would display the OFF node) but there may be cases where the model may be easier to use in the CS if it defaults to ON (1) or INT-DAY (2) instead.
Warning
OFF, ON, and INT-DAY should all be NiNodes, not NiTriShapes. Even if your mesh only uses a single shape, put it underneath a NiNode.
OFF
OFF is displayed during the day for exterior objects and during the night for interior objects. It generally does not glow or have any special effects.
ON
ON is displayed during the night for exterior objects. It is not used at all for interior objects. It generally glows.
Many of the objects under this node will have a complex UV animation to make them appear to flicker at night. Below is an explanation for how those can be set up on new shapes:
Texture Properties and UV settings
- Base Texture = Light/Dark Gradient Texture on UV 0 (~10% scale, vertical position controls brightness, generally placed just below center)
- Dark Texture = Dark map on UV 1 (positioned/scaled to get the right look with some darkening around the edges)
- Detail Texture = regular window Texture on UV 2 (sometimes might use the same UV as the dark texture)
Note: UV 0 is what’s animated by the controller (the flickering animation), so the dark and detail textures must be on a different UV.
INT-DAY
INT-DAY is not used at all for exterior objects. It is displayed during the day for interior objects. It generally glows and may contain light rays.
If a model uses light ray effects, they should be all be placed within the first node underneath INT-DAY and named “rays”. This allows players using MWSE to switch the rays off in the MCM. Any nodes or shapes can follow after the “rays” node.
MWSE-Only
As of GitD 3.0.0, the Lua code controls the material settings of all shapes underneath the INT-DAY node to match the time of day and weather. And it will gradually fade between INT-DAY to OFF at dusk and the reverse at dawn. Therefore, it’s important to note a few things:
- Avoid using vertex coloring (vcol) on the switchable portion of interior objects. Vcol and NiMaterialProperty settings are mutually exclusive. Using vcol on the new shape will break this functionality.
- The INT-DAY and OFF shapes should use the same textures to hide the switch between them.
- The INT-DAY shapes should not use a glow map since the code controls the emissivity and it will also noticeably turn off when switching to the OFF shape(s).
- Interior shapes’ OFF materials dictate how dark windows will appear at night. Darker settings than normal for Ambient and Diffuse are recommended. GitD meshes mostly use
0.3 0.3 0.3by default.
AttachLight
MWSE-Only
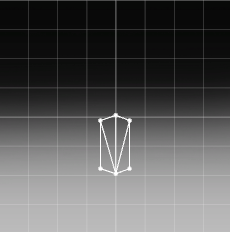
Similar to NightDaySwitch, the relative position of AttachLight in the NIF file structure isn’t important, but it must be at the top level. If the option is enabled in the MWSE MCM, AttachLight tells the code where to place a light for a given GitD object. It will be placed directly at the AttachLight NiNode location in the NIF. By default, the code will create a pure white light with a radius of 200 units.
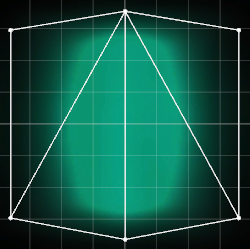
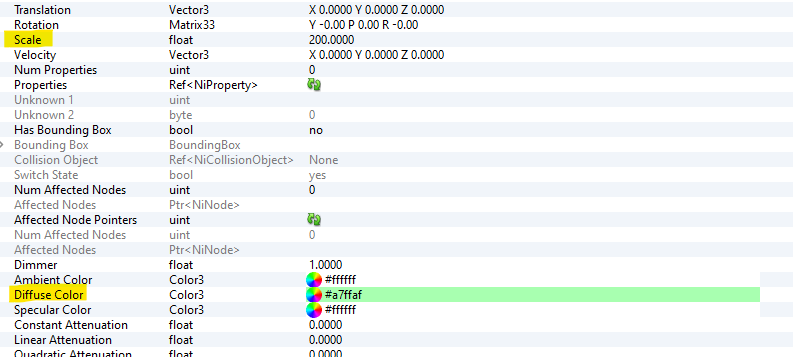
Optionally, a NiPointLight can be added as a child to the AttachLight node to control the color and radius of the light. Only two properties of the NiPointLight matter: Diffuse and Scale. The former is multiplied with sky color to modify the light through the window (can simulate colored or thick glass). The latter is directly used to modify the scale of the light source (e.g. scale of 500 is converted to a radius of 500 units in game).
For example, the image below shows a NIF which will create a light with a radius of 200 units and a green hue.
Method for determining final interior window coloring and properties
MWSE-Only
For advanced users, this process was written by NullCascade to explain how the new color settings in GitD 3.0.0 and beyond are achieved.
- First, find the region sun color. This is calculated based on the time of day, current weather, and transitioning weather. This is the starting point for the color.
- If this color is “darker” than the hardcoded
0.3 0.3 0.3minimum value, it will be scaled up to the minimum brightness.- Calculate a “dimmer” value. This is a value between 0 and 1 for how bright it is outside, determined by time of day and a predetermined brightness for the weather type. For example, clear weather has a multiplier value of 1.0, foggy weather a value of 0.5, and overcast weather a value of 0.6, so a foggy day can only get a dimmer as high as 0.5.
- If there is an AttachLight light provided, multiply the color by that light’s diffuse value.
- Set the rays and light to this color value. Set the ray’s alpha and light’s dimmer to the dimmer value.
- Finally set the material property on the windows. This sets the property’s ambient, diffuse, and emissive value to the window color. The window color is the maximum of the window’s “off” state and the calculated color. So “off” values of
1 1 1will always be1 1 1.